

I took a break from continuing snapfitting the PG 1/60 Strike Freedom...
This post covers mostly the removing of gaps and spaces, seamlines, and other problemtaic things before adding more details to the model ship using two ways, one with MR. SURFACER 500 and the other with TALCUM POWDER...
2011 Jan. 23, 5:30 AM - Seamline and gap removal using MR. Surfacer 500

I applied some MR. Surfacer 500 to those gaps that are located in ares that are easy to sand, areas on open spaces, not on those corners... Though I think I should have used another method for it since I had a pretty hard time sanding the excess off at the time...


So after the Mr. Surfacer 500 had dried, I used a #400 Sand paper to sand off most of the excess LIGHTLY careful enough not to erase the details.
Remember that sanding a model is not like sanding a piece of wood... You must always remember not to ruin the edges, details, and overall shape of the model.
I will still need to sand them again with a much higher number of sandpaper (maybe 900 above) to smooth out the surfaces more... and some areas needs a round 2 of Mr. Surfacer...


2011 Jan. 28, 6:50 AM - Removing Seamlines and gaps using Talcum power.
I have been awake for almost 30 hours by the time I started doing this part of the WIP... good thing "the zone" kept me concentrated and awake...
So here's the part where I'll be using Talcum powder (baby powder) to cover the gaps and seams on the "hard to reach" areas like those in the corners, which are pretty impossible to recieve a decent sanding when MR. Surfacer is used...
I actually learned this technique from another Japanese modeler (whose name I don't know) who did a Millennium Falcon model kit. Though I'm not sure if he really used Talcum powder or something else, but it is something similar...


So I applied the talcum powder little by little on those areas, filling up those tiny spaces... it's ok if the application is too messy, you can just (lightly) blow the excess away... but don't put too much powder that it covers the whole model... just thin coats like applying paint...


Then ready your Future... this stuff will be used as a setting solution or some glue to settle the powder in place...

Before applying the Future, make sure to remove any excess powder covering and part of the details of the kit...
So apply it, again, with thin coats... you don't actually need to apply it with a brush, even a stick or paint stirrer can do the job... because all you need is a few drops of Future and let it run on those little corners...

Let the Future dry and if there are anymore spaces to be filled... repeat the process again...

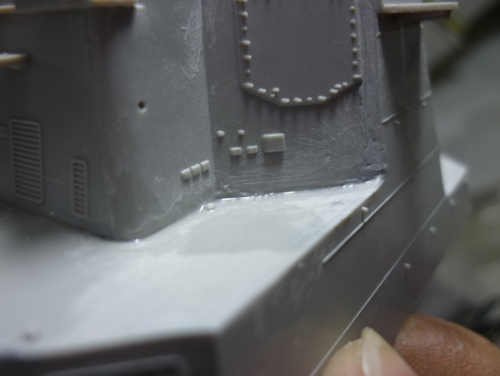
Here's one Super Structure suspended, waiting to dry...


This part however had a rather huge gap that I had to mix both Future and Talcum powder on the model itself just to cover it... I think after it dries, the Talcum powder would be easier to sand than Mr.s Surfacer...


Both Super Structures wainting to dry...

I still have to clean these up more after the Future completely dries... remove any excess powder and putty...
Here's another test fit...

So I've been awake for almost 36 hours now... I still have class later this afternoon so I think it's better for me to sleep on this and continue work later...
Ja!
Mata ne
No comments:
Post a Comment