

After 9 long months... I have at least finished my first ever custom Gundam. Wing Gundam Zero Repair might be a good name for the project since Gundam 00 is like Gundam W but with Exia Repair, so here's Wing Gundam Zero Repair. (sounds corny?)
.
Anyways... this post would show the painting process and the final modding of the 1/100 HG kit. (IMAGE HEAVY) Pictures were taken from different dates spanning about a 2 weeks before this post...
.
So here are most of the parts held by sticks on styrofoam...

Primed so the acrylics would stick well to the plastic, and to check for visible errors...


Fixing Errors...
The shoulder armor had a huge seamline so I decided to cover it up with Mr. Surfacer 500...


I didn't bother spray primer over the white parts (but it would've been a good idea to produce some kind of paint fading effect while actually painting the kit later...) I just painted them with a quick thin layer of Tamiya acrylic white to produce another shade of white other than the plastic white.

So here's the shoulder parts after drying and sanding off the excess Mr. Surfacer.


Then primed again...

The Blue is a mixture of acrylic Blue and a little Skyblue with about 50%-60% thinner.

Painting the Flats...
First thin coats...


German Gray was used for the internals and other mechanical details or joints...

Errors on painting were fixed later on the following coats...


After painting the base coats, the parts were sealed with a thin coat of Future.
Drybrushing Highlights/ Tints and Enamel Washes
Since German Gray was used on most gray parts, I chose a German Gray + Light Gray mixture for highlighting the gray parts... The mixture was applied by drybrushing on the edges of the parts...


After drybrushing highlights, I sealed the colors again with a thin layer of Future to prepare it for enamel washes...
Enamel Wash
Here's my usual Black wash on the ready... 1:4 Black Enamel and 3:4 Thinner...


Cleaning off the excess with a cotton bud dabbed in Enamel thinner...


I cleaned off the excess enamels on the other parts, then sealed them off again with a thin coat of Future.
I started to assemble most of the main body parts by this point, to prepare it for weathering and to study the how to weather the kit overall. I also left out some parts to add to the sense that this was a "repair" custom.

The white parts that hold the wings were cemented in place so it would be more sturdy and not tend to wiggle when the Gundam is finally assembled.


Those wires would actually goes inside other armor parts, just to add some detail to the overall look, it dossn't really do anything electrical...


The glossy effect made by the application of Future...


Silver Highlights
Cheap Reeves Acrylic silver for drybrushing more Highlights on the gray parts...

Those shiney whites are actualy the silver coated parts...

The tubing on the Buster Rifle was painted with silver...

The tip was painted with silver, and the tubing underneath also...
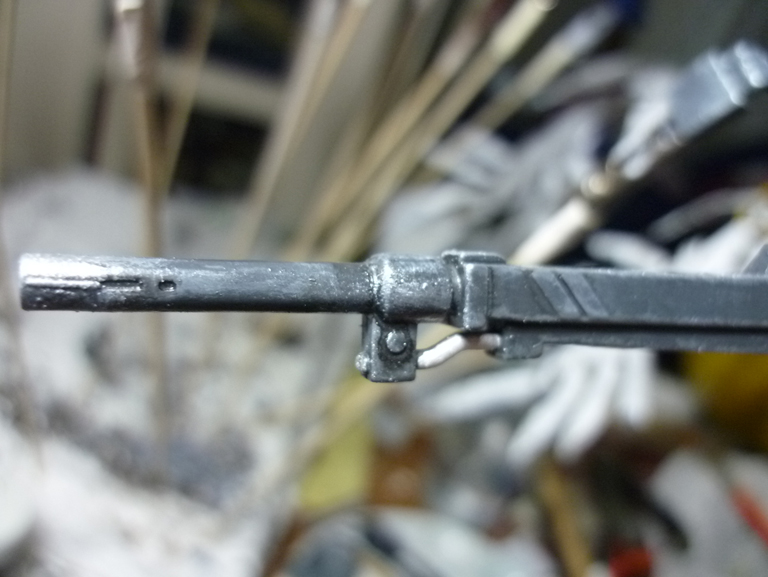
The edges were also applied with a thinner silver drybrushing as to not cover the previous highlights...


Here's an over all look of Wing Zero assembled without the wings... And I really think the hand painting the kit came out better than expected since you don't really get "professional" results by just handpainting the whole kit. I'm starting to want an Airbrush already...


Awesomeness was sealed with another thin coat of Future to prepare it for weathering and battle scarring...
Paint Chipping/Scratches
So here's a normal sponge and a mixture of German Gray, Light Gray, Flat Aluminum, and Gunmetal paints, to be applied as paint chipping effects.
I actually saw this Sponge Technique used by DC23 on Gundams first, I just thought why not try it also since it's my first time to actually customize and paint a Gundam model, and I wanted to try most of the basic techniques on my first custom.


As always, sealed with Future...
.
More Black Enamel Wash and Rusting Effects
I did another coat of black enamel wash over the gray paint chip effects so it would somehow blend in.


This is a blend of cheap Reeves Acrylics... copper, bronze, silver, red, yellow, black, and green, varying in mix ratio. I actually prefer using this brand in Drybrushing effects because the paint itself is thick and is also cheap, and the colors build up better than using pastels. And it is way cheaper than using Tamiya Weathering effects.


Drybrushing Soot Effects
This is just cheap black acrylic ready for drybrushing to creat Soot Effects.


Here's a headshot of the nearly finished Wing Zero.


Green Sensors
These little green sensors would be the last modding to be done to the kit. I used Clear 0.3mm Plaplates Painted with Flat Aluminum on one side, and Clear Green on the other. then sealed the whole Plaplate with Future, let dry, then cut to pieces made to fit those little sensor areas, put with cement, a little more black enamel wash, clean, then seal it again with Future...


That circle is the original sticker that came with the kit...


Until next post!
.
Do you use this much buds in doing a custom???

No comments:
Post a Comment